ഗ്രാഫിക് ഡിസൈനിങ്ങ് ഓണ്ലൈനില്
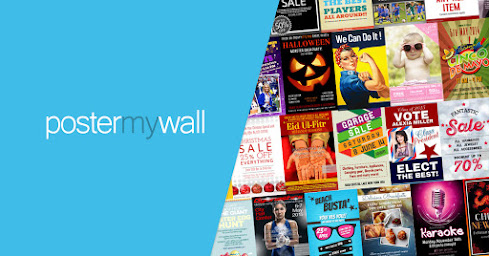
Postermywall.com വെബ്സൈറ്റ് ഉപയോഗിച്ച് മനോഹരമായ പോസ്റ്ററുകൾ എങ്ങനെ നിർമ്മിക്കാമെന്നാണ് ഇവിടെ വിശദീകരിക്കുന്നത്. ഒരു ഡിസൈനറുടെ സഹായമില്ലാതെ പ്രൊഫഷണൽ പോസ്റ്ററുകൾ സൃഷ്ടിക്കാനുള്ള എളുപ്പവഴി. www.Postermywall.com എന്ന വെബ്സൈറ്റാണ് ഈ പ്രവര്ത്തനങ്ങള്ക്ക് നമ്മെ സഹായിക്കുന്നത്. ചുവടെ പറഞ്ഞിരിക്കുന്ന ഡിസൈനിങ്ങ് പ്രവര്ത്തനങ്ങള് പ്രത്യേക ഗ്രാഫിക് ഡിസൈനിങ്ങ് പരിശിലനമില്ലാതെ ഏതൊരാള്ക്കും അനായാസം ചെയ്യുവാന് സാധിക്കും.
FLYERS
POSTERS
SOCIAL MEDIA GRAPHICS
DIGITAL SIGNAGE
ALBUM COVERS
LOGOS
MENUS
ZOOM BACKGROUNDS
WEB BANNERS
GIFT CERTIFICATES
BUSINESS CARDS
PRINT BANNERS
KINDLE/BOOK COVERS
ONLINE ADS
RESUMES
LABELS
NEWSLETTERS
INVOICES
POST CARDS
TEACHING AIDS
CERTIFICATES
CONCEPT MAPS
SCHEDULES
INVITATIONS
PRICE LISTS
PERSONAL
MAGAZINE COVERS
RECIPE CARDS
LETTERHEADS
BROCHURES
TICKETS
TAGS
DOCUMENTS
Postermywall.com എന്ന വെബ്സൈറ്റാണ് ഈ പ്രവര്ത്തനങ്ങള്ക്ക് നമ്മെ സഹായിക്കുന്നത്. ഗൂഗിളില് Postermywall എന്ന് സേര്ച്ച് ചെയ്ത് PosterMyWall: Easy Promotional Posters, Graphics & Videos Postermywall സൈറ്റിലെത്തുക. 201000 ലധികം ടംബ്ലേറ്റുകള് ഇതില് ലഭ്യമാണ്.
CREATE A DESIGN ബട്ടണില് ക്ലിക്ക് ചെയ്ത് Discover templates ജാലകത്തിലെത്തുന്നു.
ഇടതുവശത്തെ Browse by size നുതാഴെ നിന്നും ഡിസൈന് നിര്മ്മിക്കേണ്ട മേഖല സെലക്ട് ചെയ്യുക.
ഓരോ തീമിലും പതിനായിരത്തിലധികം ടംബ്ലേറ്റുകള് ലഭ്യമാണ്. ഉദാഹരണത്തിന് ഓണവുമായ് ബന്ധപ്പെട്ട ഒരു പോസ്റ്റര് നിര്മ്മിക്കണമെന്നിരിക്കട്ടെ..
ഇടതുവശത്തെ Poster ല് ക്ലിക്ക് ചെയ്യുന്നു.
മുകളിലെ സേര്ച്ച് ബോക്സില് Onam എന്ന് ടൈപ്പ് ചെയ്ത് എന്റര് അമര്ത്തുന്നതോടെ ഓണവുമായ് ബന്ധപ്പെട്ട ടംബ്ലേറ്റുകള് ലഭ്യമാകും. യോജിച്ച ടംബ്ലേറ്റില് ക്ലിക്ക് ചെയ്യുക.
CUSTOMIZE TEMPLATE ബട്ടണില് ക്ലിക്ക് ചെയ്ത് മാറ്റങ്ങള് വരുത്താം.
സോഫ്റ്റ്വെയറില് ലഭ്യമായ മറ്റ് എഡിറ്റിങ്ങ് ടൂളുകള് സ്വയം മനസിലാക്കാവുന്നതേയുള്ളു.
environment day, teachers day, birth day, retirement എന്നിങ്ങനെയുള്ള കീ വേഡുകള് നല്കി നമുക്കാവശ്യമായ ടംബ്ലേറ്റുകള് കണ്ടെത്തുക. വേണ്ടുന്ന മാറ്റങ്ങള് വരുത്തുക.
കസ്റ്റമൈസേഷന് പൂര്ത്തിയായാല് ഇമേജ് ഡൗണ്ലോഡ് ചെയ്യാം. File --> Download--Basic Image--> Download വഴി ഇമേജ് ഡൗണ്ലോഡ് ചെയ്യാം.
The PosterMyWall editor is all about simplifying design, with the help of easy drag and drop options, and built in libraries to browse and use additional content, such as stock images and videos, clipart and shapes.
Now we will look at some of the most basic parts of the PosterMyWall editor to get you started with designing. To familiarize yourself with the editor, here are its 6 most basic parts, useful for all kinds of designs:
Background - Use this option to change your background, and you have a variety of options, which include:
-
Solid Colored Backgrounds: Choose a solid color for your background.
-
Gradient Backgrounds: Use this to set two-colored backgrounds with a linear or radial gradient.
-
Transparent Background: This is a must have if you’re creating logos and vector designs.
-
Upload Background: Use this to upload a background from your device.
-
Stock Photo Background: Use this option to browse stock photos from Storyblocks, GettyImages, Pixabay or PosterMyWall.
Media - Use this option to add videos and audio to your design. These options include:
-
Add from My Videos - Upload a video from your device to use in your design.
-
Add Stock Video - Browse and pick a video from our stock video resources to use in your design.
-
Add from My Audio - Upload an audio file from your device to use in your design.
-
Add Stock Audio - Browse and pick audio clips from our stock audio resources. You can add multiple audio files to your design.
Photo - Use this option to add a photo. You have multiple options to add photos in your design. These are:
-
My Photos: This allows you to add photos from your device.
-
Stock Photos: Use this option to add stock photos from Storyblocks, GettyImages, Pixabay and Flickr.
-
Add from Facebook: Browse and add photos from your connected Facebook account’s albums and photos to your design.
-
Add from Google Drive: Add photos directly from your connected Google Drive to your design.
-
Add from Dropbox: Add photos directly from your Dropbox account to your design.
Layout - Add from various layout options to create specific kinds of designs, such as menus and schedules.
-
Add Schedule - Choose from various schedule layout options to create a sports or concert schedule.
-
Add Menu - Choose from various menu layouts, add your menu items and create a menu.
-
Add Table - Add a table to neatly display any kind of data in your design.
-
Add Tear-off Tabs - Add tear-off tabs to your flyer with contact information.
Text - Text allows you to add text boxes, and even menu layouts to your design. Here are the text options.
-
Add Plain text: This is the backbone of any of your designs. When your text box is selected, you’ll find a variety of font options. You can also change the font size, color, alignment, line height and kerning.
-
Add Fancy text: Add vibrant, texture heavy text items.
-
Add Menu: If you’re creating a menu, this is a must use option.
-
Add Animation: Use this option to animate your text, and to present more in less space.
Clipart - Use this option to add shapes and clipart in your design:
-
Add Shape: Add geometric shapes, such as squares, triangles and circles, and other shapes such as arrows and price tags.
-
Add Clipart: Browse and add stock clipart from Pixabay and Storyblocks.
Save - Once you’re done designing, save the design. Saved designs will appear in your My Stuff page, and can be edited, copied, downloaded and removed at any time.
Download - Get a free download, which are great for sharing online, or if you’re looking for a higher resolution download for prints and videos, you can also purchase a paid download via the download option.
വലിയ കംപ്യൂട്ടര് പരിജ്ഞാനം ഒന്നുമില്ലെങ്കിലും സ്വന്തമായി ഒരു ഡിസൈന് നിര്മ്മിക്കുന്നതിന് നമുക്ക് സാധിക്കം. ജീവിതത്തില് ഒരിക്കലെങ്കിലും ഇത്തരം ആവശ്യങ്ങള് ഉണ്ടായിട്ടുള്ളവര് ധാരാളമുണ്ട്. അവര്ക്ക് സഹായകരമാകാനാണ് ഈ പോസ്റ്റ്. സ്വന്തമായി പ്രാക്ടീസ് ചെയ്യുക. നല്ലൊരു ഡിസൈനറാകുക.


No comments:
Post a Comment